
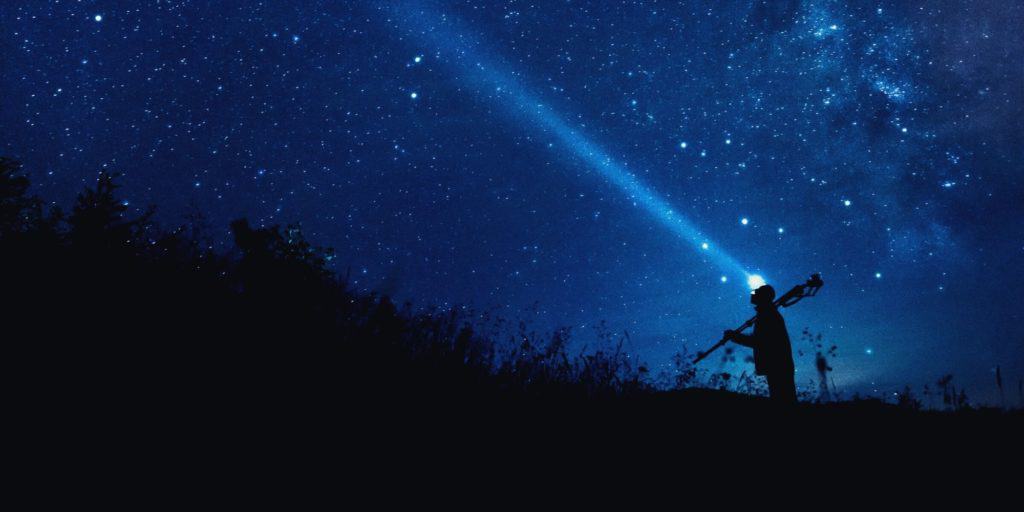
The newest generation of camera sensors has made it possible to capture stunning night sky photography
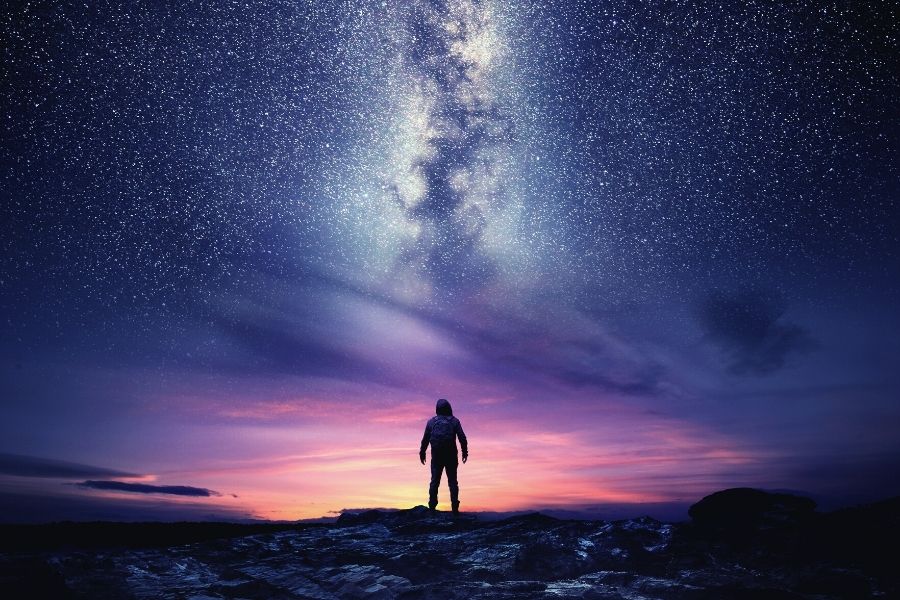
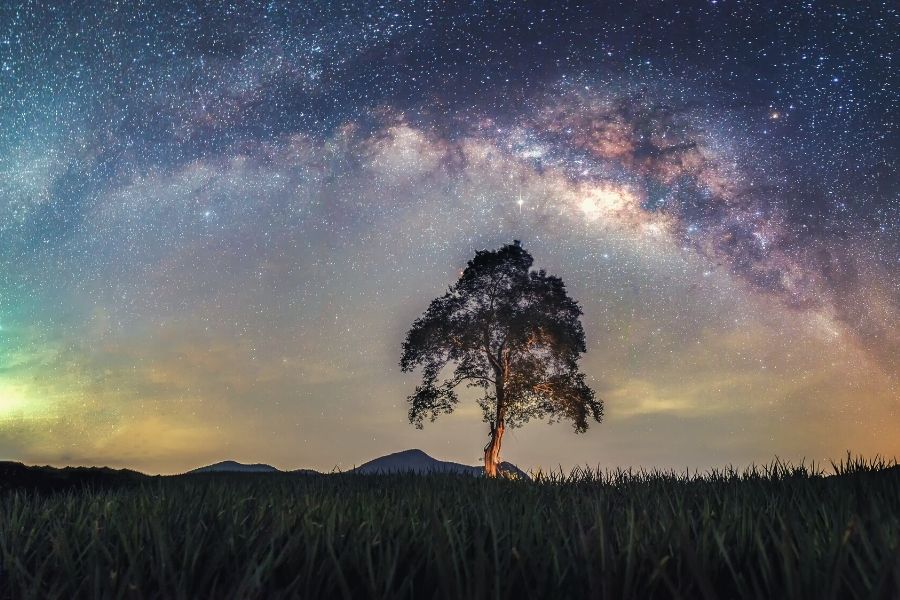
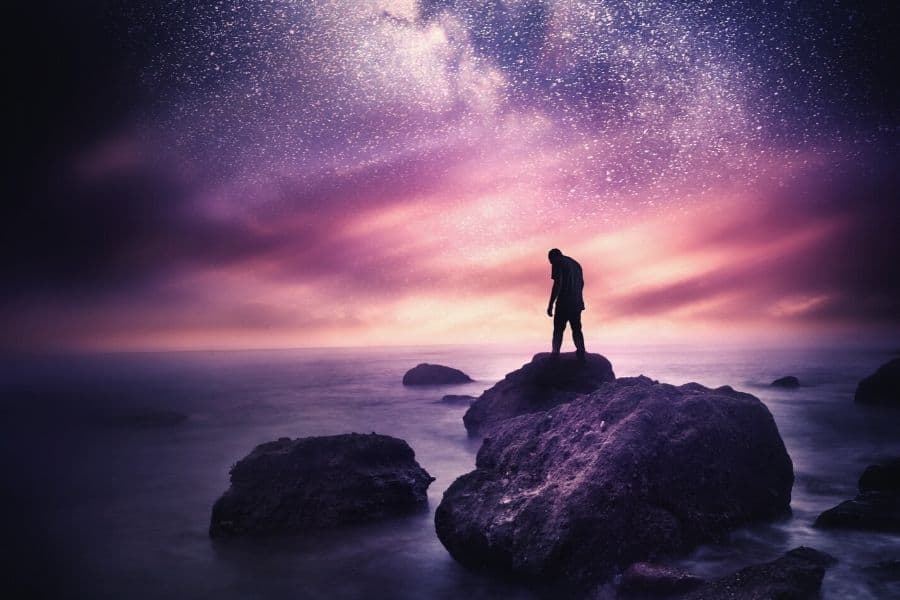
Astrophotography sounds technical, but it’s just a landscape where you want the stars to be included. The best images tend to combine some distinctive foreground landscape with the star-filled sky above.
The Canon EOS M mirrorless camera bodies are excellent for getting started in astrophotography.
Their sensors pick up superb detail, but the trick is to get away from city lights and mount the best lens for the job.
Here’s a look at the seven best EF-M lenses for astrophotography:
The new generation of Sigma lenses has been blowing photographers away no matter what their specialty is.
The Contemporary lineup is a group of high-performance lenses for APS-C sensor cameras like the EOS-M family.
With a fast f/1.4 aperture, this lens blows away every other lens on my list.
At just under 26 mm in 35 mm terms, the focal length is a bit higher than what I would normally use for wide-angle astrophotography, though.
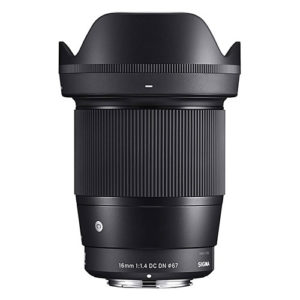
The biggest thing that this lens has going for it is its multifunctionality. Since it’s a fully electronic lens with autofocus and exposure settings, you’re far more likely to use this wide-angle for many other things.
It’s a great size for general landscapes and even as a walkaround travel lens. And since it’s custom-built for a cropped sensor camera, this Sigma DC lens is smaller, lighter, and cheaper than most other f/1.4 lenses on the market.
The Sigma’s optics are also first-class, with industry-leading low dispersion elements to reduce chromatic aberrations and ghosting.
Their Super Multi-Layer Coatings also reduce flare, a great feature if the moon or other bright object is in your image.
When it comes to astrophotography, I like to have a super-wide-angle prime on hand. Rokinon’s have been my go-to lenses for a few years for this purpose.
Their image quality is always surprising for their price point.
There are certainly sharper lenses out there, but Rokinon has built a stellar reputation among star photographers.
They are fast, and they are wide. And since most of them are fully manual, you can save a little money over the electronic versions.
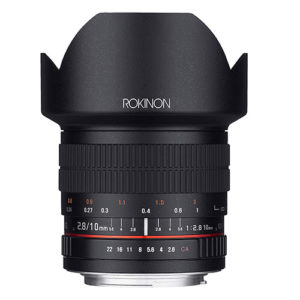
If 10 mm is a little too much, there is the slightly faster Rokinon 12mm f/2.0.
Choosing between the two is almost impossible, but remember the APS-C crop factor of 1.6x makes the 2 mm focal length difference larger than you might at first realize.
In the end, both are wide, fast, rectilinear lenses that are perfect for astrophotography if you want an inexpensive manual lens.
If you already own the Canon EOS M adapter to use EF-mount lenses, there are a few other lenses worth checking out.
The next generation of Samyang lenses, dubbed the XP line, feature the same excellent optics as the original Samyang lenses but now feature an AE chip that talks to the camera.
While it’s still a manual focus lens, the aperture is now electronically controlled to allow you to use your camera’s P, Tv, and Av settings instead of resorting to fully manual.
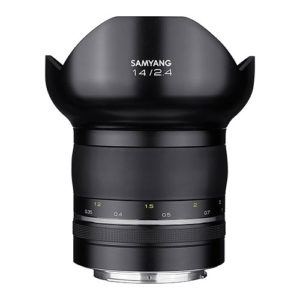
The camera will also record the lens data in its EXIF data, so RAW files can be corrected with preprogrammed lens profiles.
The new XP 14 mm f/2.4 is a great lens with good coatings to reduce fringing and ghosting. Like the other Samyang and Rokinon wide-angle lenses, this one incorporates a built-in lens hood that makes using screw-on filters impossible.
That’s not a problem for astrophotos, but you may need to consider it if you want to use it for other landscapes.
The slightly older version of the lens is still available, the Samyang MF 14mm f/2.8 Mk2. Note that this is slightly slower, but not enough to be noticeable. This lens does not have any electrical contacts and relies on an old-school twist aperture control ring. According to the Samyang website, a Canon EF-M mount version of this lens is available as well.
Fisheye lenses are uniquely suited for astrophotography.
They let in a lot of light, and they produce the most expansive field of view possible. What’s more, the barrel distortion that renders them unusable in many situations is much less noticeable in this sort of photo.
It is still what I would call a special-use lens, though, and it’s not right for everyone.
The Samyang 8mm f/2.8 UMC Fisheye II is a nearly identical lens with very similar specifications.
When in doubt, pick the one that’s cheapest or available at the time.
If you’d like to dip your toes in the fisheye water, there’s an even more budget-friendly option.
The Brightin Star 7.5mm f/2.8 Fisheye sells for just under $150, making it an easy choice for even a rarely used toy.
As a bonus, it’s got a diminutive size that feels light on your camera. This is a relatively new lens, so not much is known about it yet.
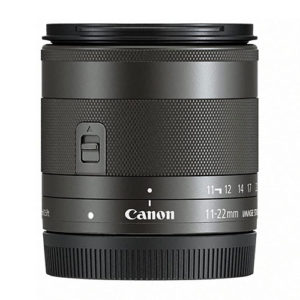
If you’re looking to get into astrophotography, but you aren’t quite ready to invest in a special-purpose lens, you can get started with this Canon EF-M kit lens.
This lens has a wonderfully wide field of view, and its only shortcoming is its slow f/4.0 aperture. It’s more than sufficient to get started and give astrophotography a try, and having a little bit of zoom capability is nice when framing different subjects.
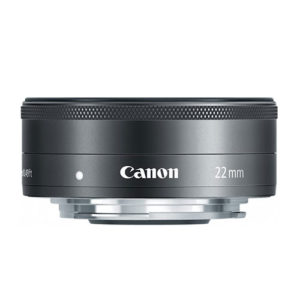
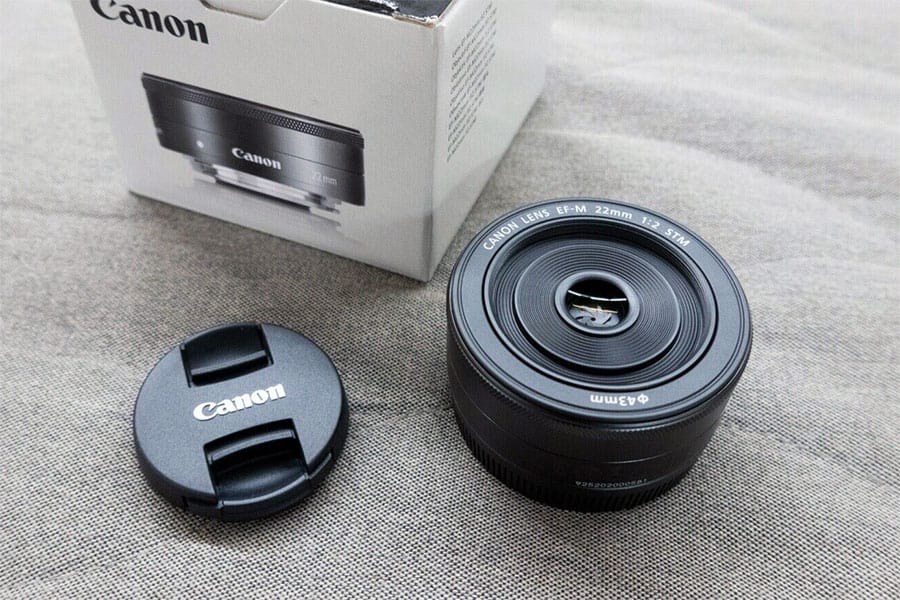
Canon makes surprisingly few prime lenses for the EF-M mount, but one of the only ones is a decent choice for astrophotography.
It is nowhere near as wide as other lenses mentioned on this list; as a matter of fact, the 22mm focal length gives you the equivalent of a standard 35 mm wide-angle lens.
This is an excellent lens for travel photography and walking around since it is so small. It’s also surprisingly fast for its size at f/2.0. If you want a lens that can do a little bit of everything, this lens might be for you.
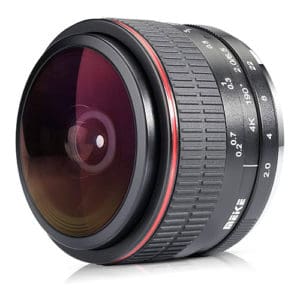
If you’re looking for a full circular fisheye, the Meike 6.5 mm f/2.0 is about the only choice.
Circular fisheyes are rare finds for APS-C cameras.
Remember, this produces a circular image with a black frame; it does not fill up your sensor. These lenses make a cool effect, but they are best reserved for special-purpose shots like virtual reality walkarounds.
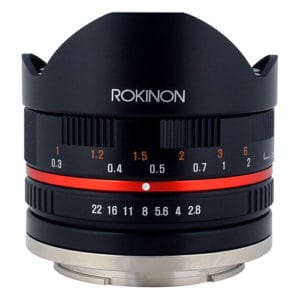
If you’d like the barrel distortion of a fisheye with full-frame coverage, check out the Rokinon 8 mm f/2.8.
The EOS M Astrophotographer's Guide
What is Astrophotography?
Astrophotography is the intersection between astronomy and photography. It can be as complicated and scientific as you want it to be.
You could use a telescope with motorized mounts and special camera attachments.
Or, you could take the camera you already own to a dark spot for some nighttime photography under the stars.
By far, most astrophotographers fall into the latter category. You don’t need specialized equipment; it’s more a subset of landscape photography than what astronomers do with telescopes.
The photos you capture can be gorgeous, and it has recently become a trendy genre thanks to the incredible light-capturing abilities of the new generation of camera sensors.
You also don’t have to know a lot about astronomy or space to enjoy astrophotography.
Like mountains, the sea, or cities, the stars make a lovely backdrop to nearly any photograph. But some knowledge about taking these images and a few landmarks in the night sky is helpful.
What are the Types of Astrophotography?
The type of astrophotography you want to do varies significantly with the type of image you are looking to take.
You can divide amateur astrophotography into three main groupings based on the field of view you want in your images.
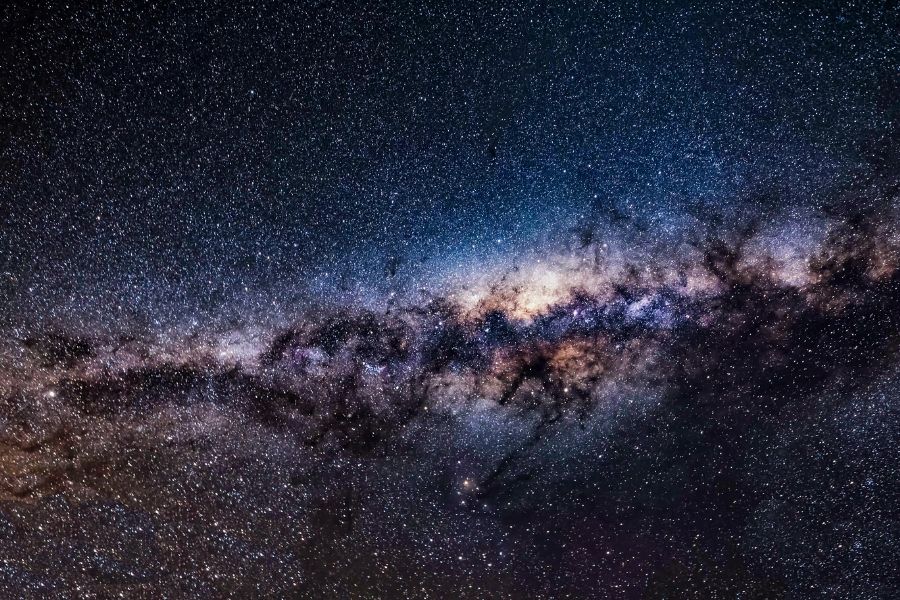
Wide-field images are taken with regular camera bodies and wide-angle lenses.
The wide-angle lens allows enough light to reach the sensor to enable a photo in very dark conditions.
The wide-field also allows for nightscapes to be included with some landscape or scenic elements like the milky way.
Narrow-field images are taken with a high-end telephoto lens. Several problems with this approach become apparent quickly.
For one, the more you zoom in with more focal length, the faster the relative motion of the starfield appears to be.
To capture a blur-free image from a stationary mount, you need to apply a lot of light and work with a fast shutter speed. The problem with this is that telephoto lenses reduce the available light, requiring slow shutter speeds.
Images of the moon or the sun (if you have special filters to protect your camera) can come out well.
It might be possible to capture images of the planets, such as the moons of Jupiter or the rings of Saturn. But anything dimmer, such as galaxies or nebulae, will be much more difficult.
The third type of astronomy photo is taken with a telescope. To capture imagery, a telescope will need to have a calibrated, motorized equatorial mount.
These mounts allow the telescope to smoothly track the stars in the sky, their motion exactly matching the motion of the earth’s surface. The result is that the stars and planets in the viewfinder remain stationary, allowing for long-exposure photography.
When doing this, some photographers mount a telephoto lens piggy-back onto the telescope for wider-field images.
Others use an adapter to mount their camera to the telescope’s eyepiece, in effect making the telescope into a telephoto lens.
Special Considerations for Night Sky Photography
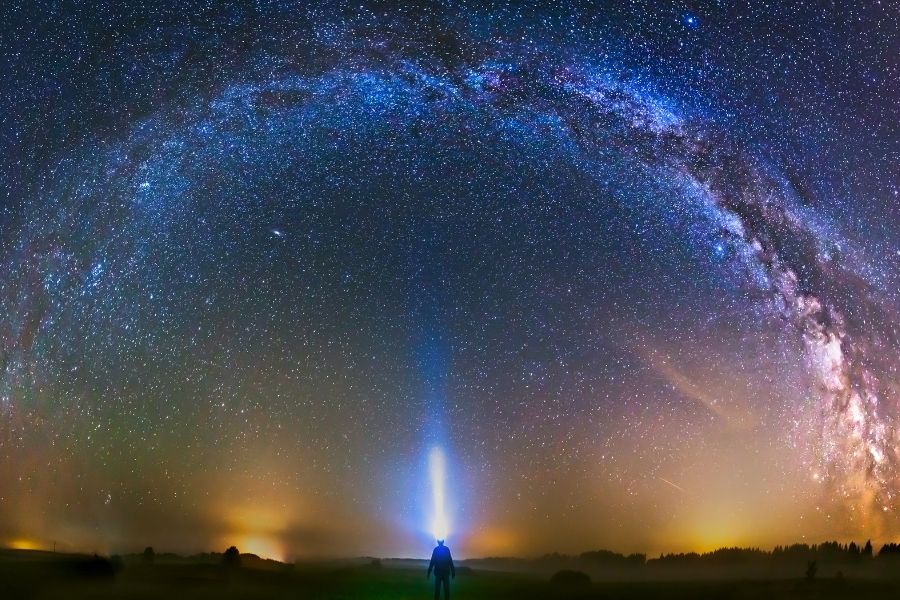
If you allow your camera to sit on the tripod and take a long exposure, it will become evident that those stationary-looking stars are actually moving.
Of course, the stars aren’t moving—you are.
As the earth spins around its axis, the view of the sky seems to pass by. Just as the sun progresses overhead during the day, the stars progress across the sky at night.
The effect is not noticeable with the human eye, but if you leave a camera taking a picture for very long, the stars will show as trails. This is how star trail photos are taken.
In the northern hemisphere, the stars appear to rotate around the North Star (Polaris). When you see star trails that spin around one point like a pinwheel, the photographer has used this effect to their advantage.
What Makes a Good Astrophotography Lens?
If your goal is wide-field nightscape astrophotography, the lens you choose should have two qualities.
You want a lens that is wide-angle and is as fast as you can get.
The goal of nightscape photography is to let as much light in as possible. Assuming that you do not have a motorized equatorial mount, the faster the images are taken, the better.
The best astrophotography lenses are prime lenses. Prime lenses are generally faster than zooms.
The fastest zoom lenses are usually limited to f/2.8, and most of those don’t get very wide. For the EOS M-mount, there are very few wide-angle zoom options.
Focal Lengths
What size lenses work best for nightscapes? There’s room for experimentation and creativity as you frame your images, but the general rule of thumb is to go as wide as you can.
A wider lens lets in more light, and it minimizes the star trail effect.
Like our eyes, a wide-angle lens barely notices the blur caused by the motion of the earth.
Where a telephoto lens might require a shutter speed of well less than a second, a wide-angle lens can let you get by with shutter speeds of 10 seconds or more. So the wider your lens, the longer exposure photos you can take.
Wide angles are also the best from which to capture landscapes and the night sky. These are big epic things, after all.
It only fits that they should need a large field of view to capture them all.
Which lenses work well for star photos? I prefer to use an ultra-wide-angle prime lens. My go-to is one between 12 and 16 mm. It’s possible to use anything between 8 and 35 mm, or even higher.
But for the reasons mentioned above, you will have better luck with something wider. The EOS M family of cameras have a 1.6x crop factor, making a 12 mm lens 19.2 mm in 35 mm equivalents.
To Fisheye or Not to Fisheye?
Wide-angle lenses have some quirks you should consider. The wider the lens, the more distortion is present in the final image.
The lens can be designed to handle the barrel distortion in two ways–by creating a fisheye effect or flattening the image out. A rectilinear lens creates a flattened image.
It’s important to realize that even these have distortions, with objects near the edges getting stretched out in crazy ways.
But here’s the good news–it probably won’t matter. Distortion in nightscape photography will only be noticeable if a familiar object is placed right on the edge of the frame.
If you use a person or a vehicle in your shot, it might look awkward. But if it’s a natural scene, the distortion probably isn’t going to draw any attention.
The benefits of shooting with an ultra-wide-angle lens far outweigh the difficulties of dealing with distortion.
Once you pick a lens, you’ll become familiar with its tendencies and frame your shots accordingly.
Circular fisheyes present an entire 180-degree field of view on your camera sensor. These lenses are rare, and for the EF-M, I know of only one–the Meike 6.5mm f/2.0. When you take the shot, you will get a black frame around a circular image.
This image is not going to use your full camera megapixels if you crop it smaller. These are specialty lenses usually used for VR images.
Slightly wider lenses possess the same barrel distortion, but they fill the frame. These are full-field diagonal fisheyes or full-frame fisheyes.
These lenses are an excellent choice for night photography since they let in so much light.
The distortion can still be annoying, though, so they’re only recommended as a secondary option. In other words, they’re fun lenses to play with, but I wouldn’t want my only lens to be a fisheye.
There are several fisheyes like this available for the EF-M with focal lengths of 8 mm or so.
Rectilinear wide-angle lenses are a little less wide, but they produce a flattened image that is usually more pleasing to the eye. It’s undoubtedly more useable in more situations.
The widest ones I know of for the EF-M are 10 mm. There are some zooms available with EF-S mounts that are interesting, too, including the Canon EF-S 10-18 mm f/4.5-5.6 IS STM. Generally, these zooms are too slow to be great at astrophotography.
Importance of Fast Lenses at Night
The next important factor to consider in lenses is how wide the aperture is, or in other words, how fast it is.
A wider aperture lets in more light, and that will allow you to shoot with faster shutter speeds.
In other forms of photography, you might worry about the shallow depth of field produced by an f/2.0 or f/2.8 lens. Surprisingly, this isn’t a concern in night sky photography.
You will usually focus the lens to infinity, which negates the depth of field issue. If you have subjects placed very close to the camera, you will have to step down the aperture and adjust the focus accordingly.
Manual Vs. Autofocus Lenses for Astrophotography
I’ve never had much luck getting my various camera’s auto functions to cooperate in my years of doing astrophotography.
The focus never works to infinity in dim light, so that’s the first thing to get set to manual.
To play with exposure settings, I wind up going to the “M” manual mode, even with the ISO and sometimes with the white balance.
The result is that I seldom care to pay for an autofocus lens for this task. There are a few autofocus lenses available.
If you use your super-wide-angle lens for other things like architectural interiors or group shots, I think autofocus is worth having.
But if you’re picking up a wide-angle for astrophotography alone, I don’t personally see any advantage to paying for an electronic lens.
It’s perfectly understandable for new photographers to be a little intimidated by working in completely manual terms.
The thing to remember is that mirrorless systems like the EOS M are about as fool-proof as you can get. The focus peaking tool allows you to nail any manual focus situation.
The Exposure Triangle for Night Pictures
Something else to keep in mind with this sort of photography is that it is trial-and-error in nature.
When you set up your camera to take a 10-second exposure, the screen preview might tell you that it’s going to come out completely black. It doesn’t know what it will capture over those 10 seconds, so you can’t preview it.
So you take your best guess and see what you get.
To make this technique work, you’ve got to be the master of the exposure triangle. You will need to adjust and tinker with all three elements—the shutter speed, the aperture, and the ISO setting.
The shutter speed will control how long the camera takes the picture. As discussed above, you can’t let this go too long.
If you leave the shutter open longer than 10 seconds or so, the stars will start blurring into star trails.
You can experiment with 15, 20, or 30-second exposures—I’ve gotten some decent results with ultra-wide-lenses.
The aperture, which usually controls the depth of field, can be adjusted to the lowest f-stop available.
If you have objects in the foreground, or you find that your lens doesn’t perform very well at the widest setting, you can always step it up from there.
The ISO is of critical importance in night photography. The EOS M cameras typically have ISO in the neighborhood of 25,600, but you might not like the results.
It’s a personal choice, and it depends a lot on the ambient light conditions, but higher ISO settings will produce grainier photographs. Just because it does ISO 25,600 doesn’t mean you should do that.
I try to limit myself to ISO 1,600, or occasionally 3,200, for the best results. It’s fun to play with faster ISO images, but I trash the results more often than not.
Tips for Getting the Best Astrophotos with EF-M Mount Cameras
Here are a few more tips for getting the most out of your night sky photographs.
- Avoid light pollution and big cities. Even if the sky appears pretty dark, your camera will pick up a lot more ambient light than you realize. Several websites provide maps of light-polluted areas. They will allow you to plot a course away from lights and find the darkest spots near you.
- Let your eyes adapt. It can take them up to 30 minutes away from bright lights to become fully adapted to night time. Use a red flashlight if you must, and stay away from bright lights for at least that long. Your night vision takes 30 minutes to build up, but it goes away instantly when you see a bright light.
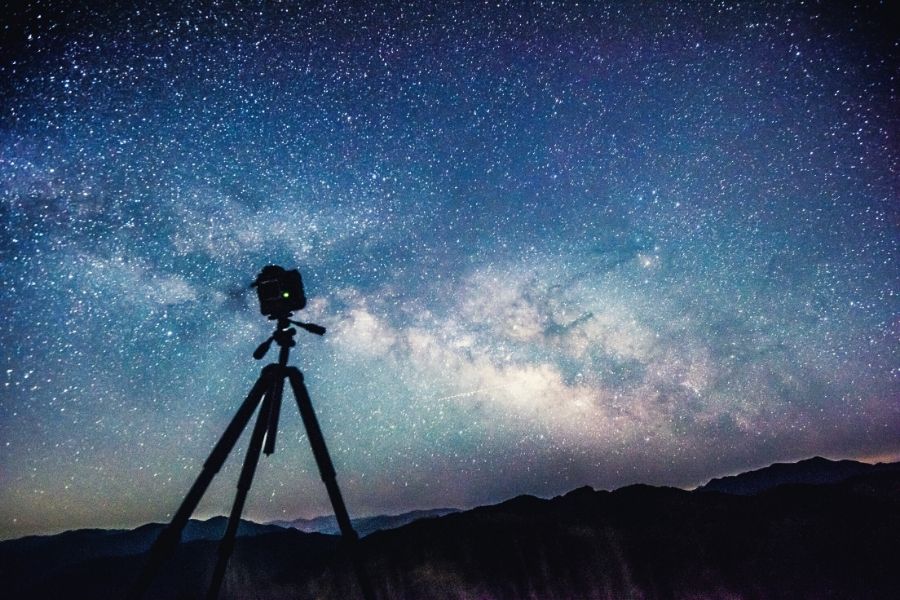
- Use a sturdy tripod. Nighttime long-exposures can’t be handheld. You need a sturdy platform that isn’t going to move in the wind. To further avoid camera shake, use a remote release shutter or the Canon Connect app to trigger the camera without touching it. Some remote shutter releases allow you to program it to take any number of photos over a set period of time–a handy feature if you’re stacking star photos.
- Find some apps for stargazing. There are several hat will teach you the constellations and help you find the North Star. They’ll also give you a heads up about meteor showers or other astronomical events, which might make interesting subjects.
- It’s often cool at night, so dress for the weather. Plan to make your stay comfortable, bring chairs and a thermos of something hot and tasty.
- On cool nights, let your gear get acclimated to the colder weather by leaving it outside in your camera bag. Don’t move it from warm temperatures to cold, and don’t take it from cold to warm without some cover. You don’t want condensation forming on the camera and lens.
- Astrophotography isn’t the time to become a minimalist. Take lots of photos, fill up your card if you must. For every shot you frame, take multiple exposures with the focus, shutter speed, aperture, and ISO all bracketed differently. The final results are often much different on a computer than on the back LCD.
- If you’re after star trails, find an app that will stack the images for you. If you take one long exposure, you’ll have problems with camera sensor graininess, battery usage, and other elements blurring or getting over-exposed.
- If there are elements in your foreground that are too dark, play with light painting and accent lights in your landscape. Light up the items for just a portion of the exposure time with a flashlight or camera light.
- Practice and try again. Your results will keep getting better as you experiment with ISO and aperture settings. Once you find just the right combination for your lens and sensor combination, you’ll be able to get better results quicker. Always make it your mission to minimize the amount of noise in the image.
List of EF-M Mount Cameras
The cameras that can use the EF-M mount are:
- EOS M
- EOS M2
- EOS M3
- EOS M5
- EOS M6
- EOS M6 Mark II
- EOS M10
- EOS M50
- EOS M50 Mark II
- EOS M100
- EOS M200
Conclusion
Astrophotography means many different things to different people, but the most fun and most easily accessible form is just a specialized type of landscape.
A wide, fast lens and a tripod are must-have items.
But once you’ve got that, all you have to do is go out and give it a try.


3 thoughts on “Top 7 Best EF-M Lenses for Astrophotography”
Good article Rudy , I have the M50 but I still can’t get my head round manually focusing to infinity .
Ive found it be very simple.Hit the button on the top right side with the square emblem, then hit info button. This will display a screen where you can zoom in 5x or 10x on another info buttom push. Aim to a bright star and then use the focus ring to get this best point of light. Works every time for me. I use the Canon 22mm f/2 for astro work.
I love to use the Laowa f2.8 9mm for astrophotography. Its very small and has a good performance.